10 Sep Part 1: Downloading Google Data with Takeout
Step 1: Google Chrome
Open Google Chrome. It’s important to use the Google Chrome browser even if your default browser is Firefox, Explorer, or Safari.

Step 2: Accessing Google Takeout
- Go to http://www.google.com.
- Search for Google Takeout.
- Click on the Go to download your data link.

Step 3: student.k12albemarle.org Account Login
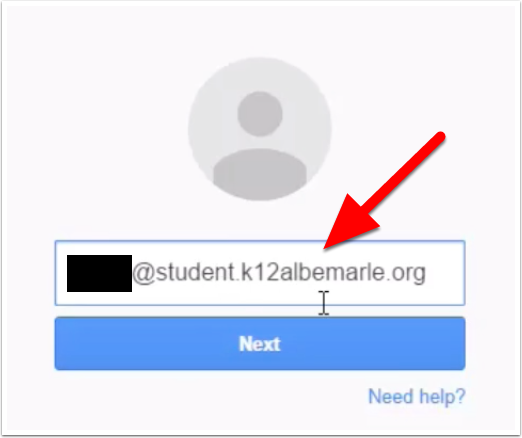
Log into your old ?????@student.k12albemarle.org Google account. It’s very important that you use your student.k12albemarle.org account! You might need to log out of your existing Google account.
Step 4: Select Data
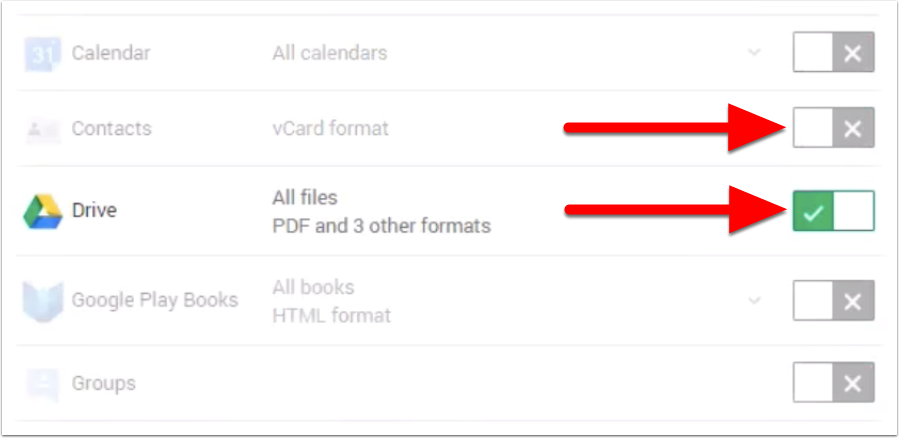
Once you login, click on the green check boxes to deselect or select data to include. If there’s a green check, then that data will be moved when the process is complete.
For now, make sure that Drive is the only row with a green check.
Step 5: Next
After you have selected and deselected all of the data, click on the blue Next button in the bottom left corner of the browser window.
Step 6: Create Archive
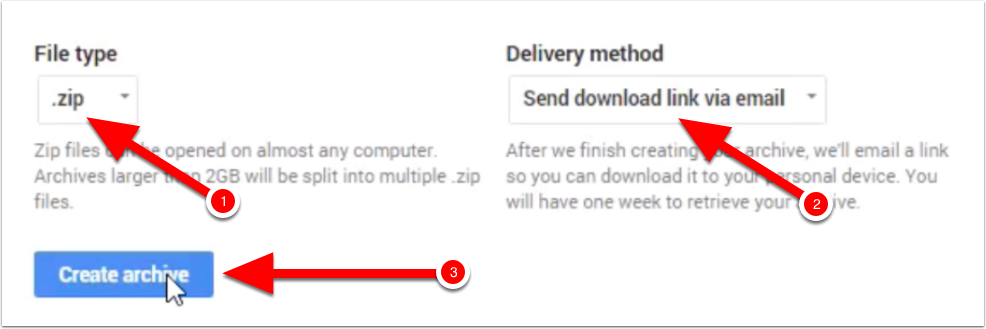
- Make sure that File type is set to .zip.
- Make sure that Delivery method is set to Send download link via email. You won’t be using email to send the file!
- Click on the blue Create archive button in the bottom left corner of the browser window.
Step 7: Wait
It will take a few minutes for Google Takeout to create an archive of your data. Tell a joke to a friend while you wait for the lovely bar to fill.

Step 8: Download Archive
Click on the white Download button when it appears. You might have to log into your ?????@student.k12albemarle.org account for a second time.

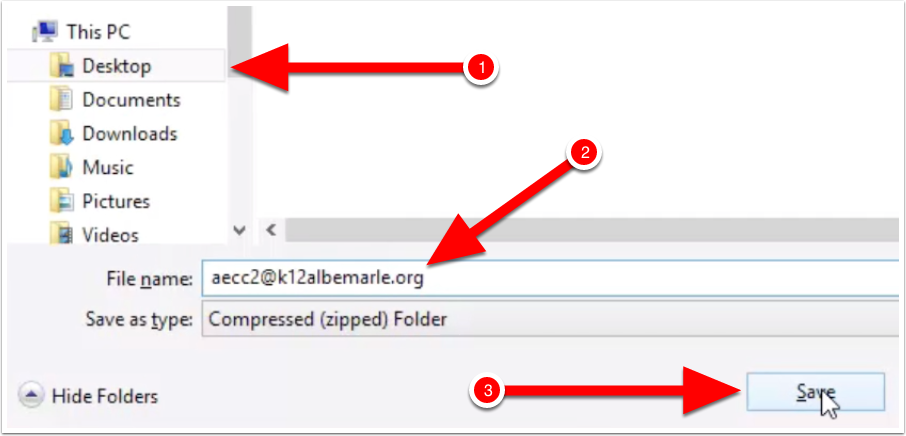
Step 9: Rename & Save to the Desktop
- Select Desktop in the save window. This is where your file will be saved.
- Rename your file using your old Google account username (?????@student.k12albemarle.org).
- Click the Save button.
Step 10: Open .Zip File
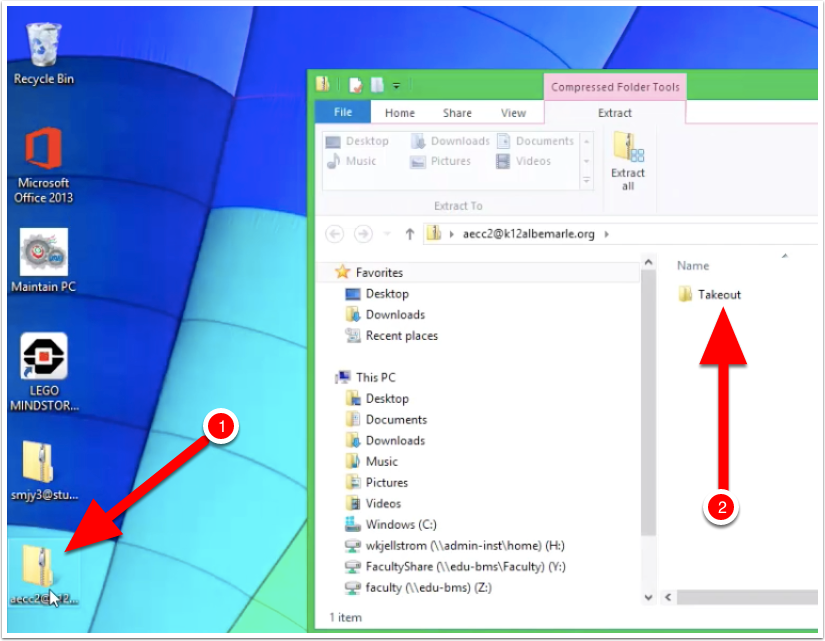
- Double click on the .zip file that you saved to the desktop. The .zip file looks like a folder with a zipper and should be named ?????@student.k12albemarle.org.
- A new window opens with a regular folder named Takeout.
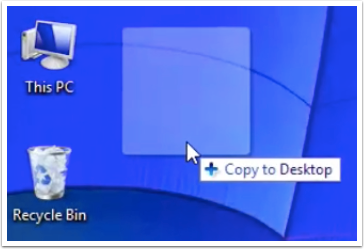
Step 11: Drag & Drop Takeout Folder
Click, hold, and drag the Takeout folder to your desktop.
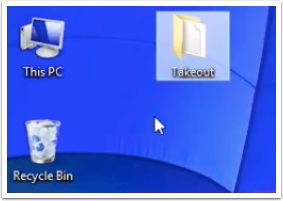
Done!
You are finished with the first part when you see a folder named Takeout on your desktop. Part 2 (a different tutorial) covers how to move the contents of this tutorial into your ?????@k12albemarle.org Google account.


Willy Kjellstrom | Part 2: Uploading Google Data to ACPS Account
Posted at 20:26h, 10 September[…] PDFMoviePart 1 […]